Open API
An Open API is a publicly available application programming interface that provides developers programmatic access to a software application or web service. Open APIs are published on the internet and are free for consumers to access.
The Open API specification is language-independent and allows both humans and computers to discover and understand the capabilities or functionalities of a service without access to its source code or documentation. When implemented correctly, it enables interaction with the service with minimal programming logic effort.
Using Open API services within your projects in RunMyProcess enhances their capabilities, providing access to a wide range of services through its Open API Library, thereby facilitating the implementation and use of these third-party services in your projects.
Marketplace
The Open API library allows you to discover and access multiple third-party services, enabling quick and easy implementation of these services.
Disclaimer: Please note that the OPEN API Import feature is provided as a way to facilitate easy access to external connectors from RunMyProcess. If you face any connectivity issues while using the third-party providers, please contact the provider support team.
Using the Open API Application
To access and interact with the Open API Application in RunMyProcess DigitalSuite, there are two distinct workflows available:
-
Access via the Projects Section:
Navigate to the PROJECTS section on your DigitalSuite homepage. From here, you can select a specific project, and within that project, access the Open API module. This workflow is ideal for managing APIs related to a particular project, giving you direct oversight of all API interactions and settings tied to that project.
-
Access via the Connectors Section:
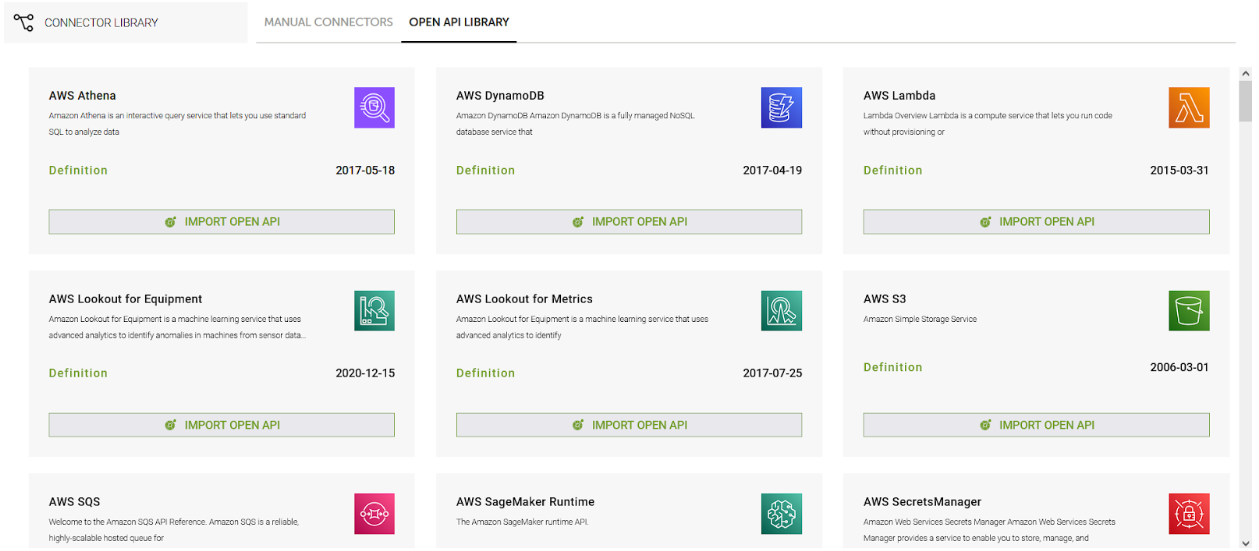
In the CONNECTORS section, users will find an Open API Library Marketplace. This marketplace enables users to discover and access a wide range of third-party services, allowing for quick and easy implementation of these services into their applications. The Open API Library simplifies the process of connecting your DigitalSuite projects to external services, offering a variety of pre-configured APIs that streamline integration and reduce development time.
Both workflows offer flexibility depending on whether you are focusing on APIs tied to a single project or managing broader API integrations across your platform. The user-friendly interface ensures that either route provides seamless interaction with your Open API resources.
Steps to Create an Open API Connector from a Project
-
Select the Project Module: On the DigitalSuite homepage, click on the Projects module to access your list of projects.
-
Select the Required Project: From the list of projects, choose the one where you want to integrate the Open API connector.
-
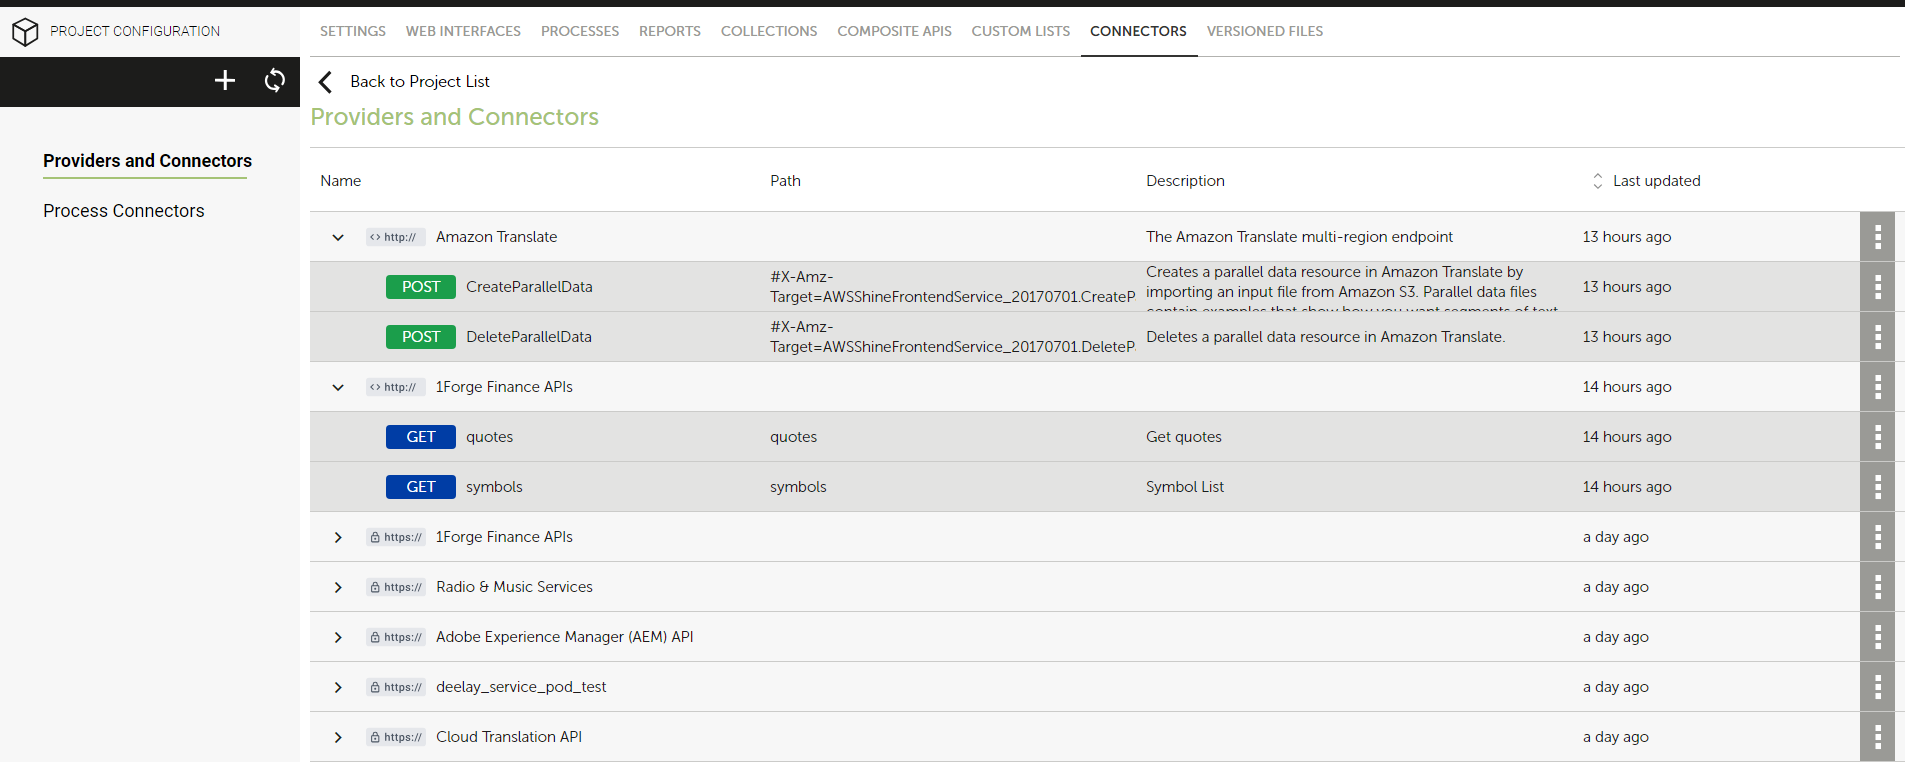
Navigate to the Connectors Tab: Once inside your project, go to the Connectors tab. This tab contains all the external services or APIs linked to your project.
-
Add a New Connector: Click the (+) New Provider button, which allows you to add a new external API service to your project.
-
Import Open API Definition: Select the Import Open API option to import an API definition.
When creating an Open API connector, you have two options to import the API definition:
A) From URL:
- Enter the OpenAPI (Swagger) URL. For example:
https://api.apis.guru/v2/specs/1forge.com/0.0.1/swagger.json. - This allows you to fetch the API specification directly from an online source.
B) Upload a File:
- Upload a locally stored Open API specification file (e.g., JSON or YAML format).
- This is useful when the API specification is created or obtained and stored on your local system.
- Enter the OpenAPI (Swagger) URL. For example:
-
Click the next icon or the next step number: Proceed after choosing the method for importing the OpenAPI specification.
-
Select Server URL for Execution Modes:
- Choose the server URL for each execution mode (TEST, LIVE, ACCEPTANCE).
- Provide the required authentication details (e.g., OAuth, API Keys).
-
Click the next icon or the next step number: Continue to the next step after setting up the server and authentication details.
-
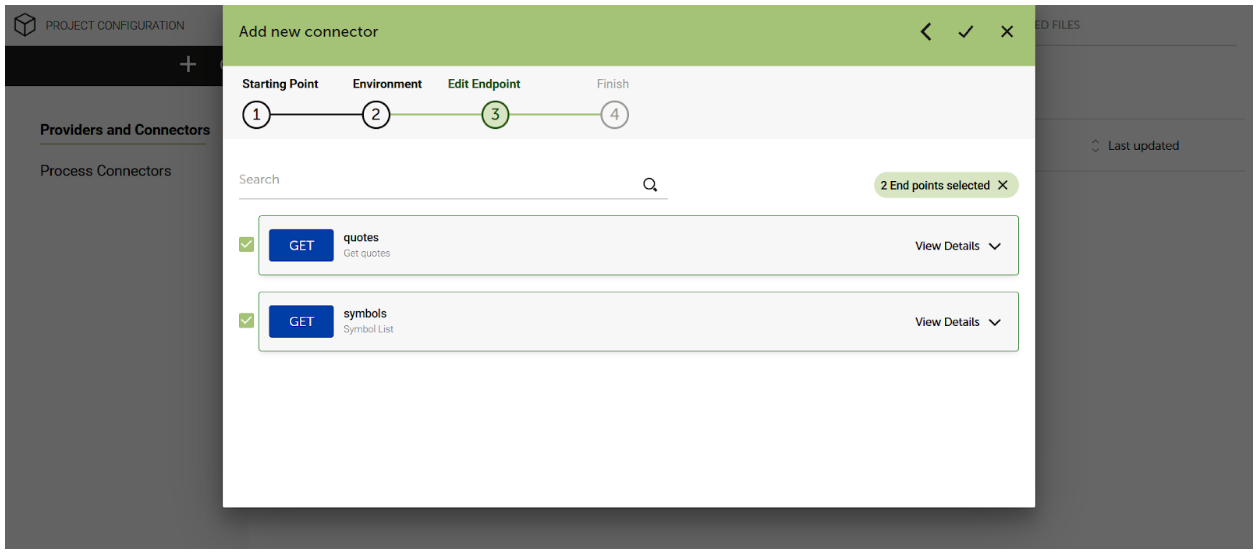
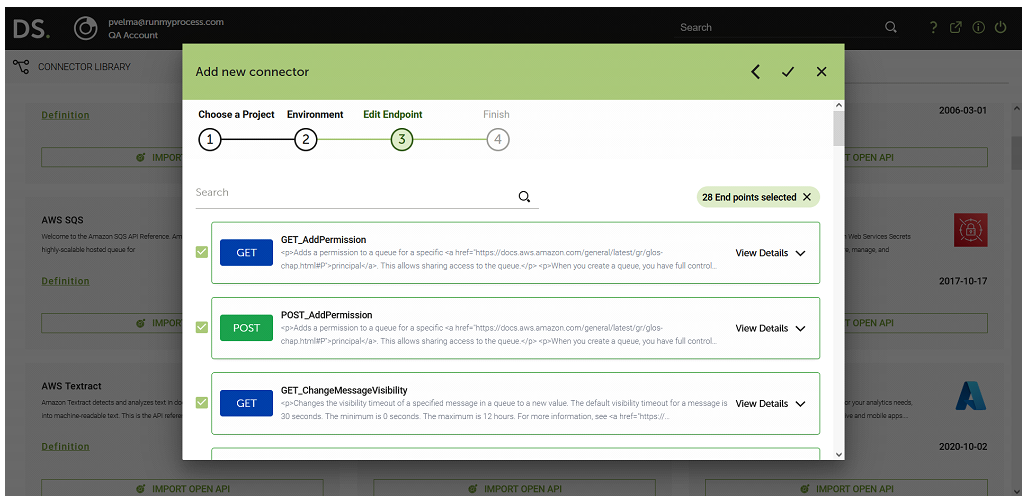
Select Required Endpoints:
- Choose the specific endpoints you need (e.g., GET, POST, PUT, UPDATE, DELETE).
- You can expand and see the details of each of the available endpoints.
- You can pick only the necessary endpoints to optimize your connector configuration.
-
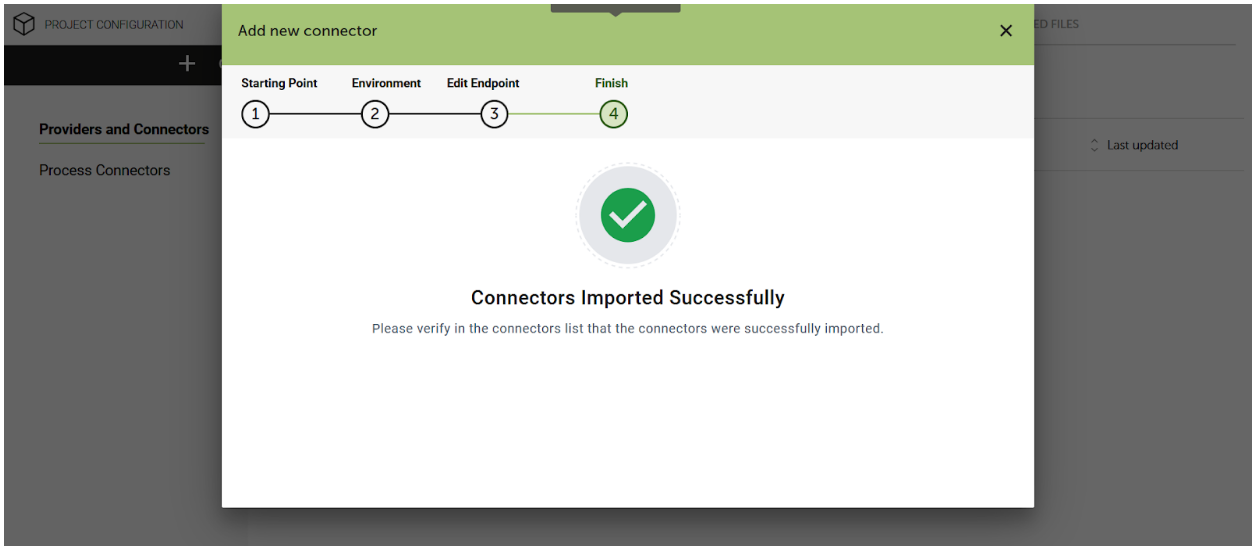
Click Finish: Complete the setup, and your new Open API connector is ready for use within your project.
Steps to Create an Open API Connector from the Connector section
Follow these steps to create an Open API connector directly from the Connectors section:
-
Go to Connectors: From the DigitalSuite homepage, click on the Connectors module.
-
Open API Library Tab: Navigate to the Open API Library tab to access a list of available Open API services.
-
Import Open API: Select "Import Open API" from the list of available APIs in the Open API Library.
-
Select a Project: Choose the project where you want to use the imported API, and then click Next.
-
Set Server URL and Authentication:
- Select the Server URL for the different execution modes (TEST, LIVE, ACCEPTANCE).
- Provide the necessary authentication details (such as API keys or OAuth credentials).
-
Select Required Endpoints:
- Choose the API endpoints you need to include in the connector (GET, POST, PUT, UPDATE, DELETE, etc.).
-
Confirm:
Click Confirm to complete the setup and finalize the Open API connector configuration. The connector is now ready for integration with your project.
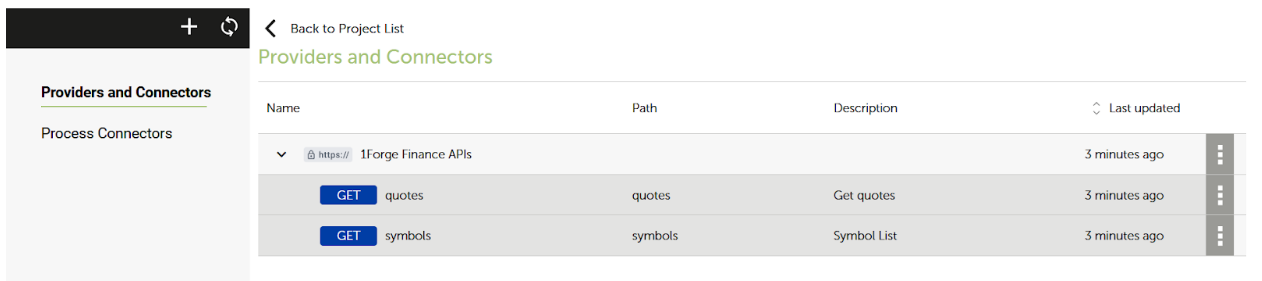
You will find all the available connectors for the project (Manual and Open API) under the connectors tab.
Key Considerations
Importing Connectors
-
Connector Selection: You can import a maximum of 100 connectors at a time.
-
Importing 25 Connectors or Less: If you select 25 connectors or fewer, the import process will be completed immediately, and you will receive a success message. These connectors will be automatically added to the project's connector list.
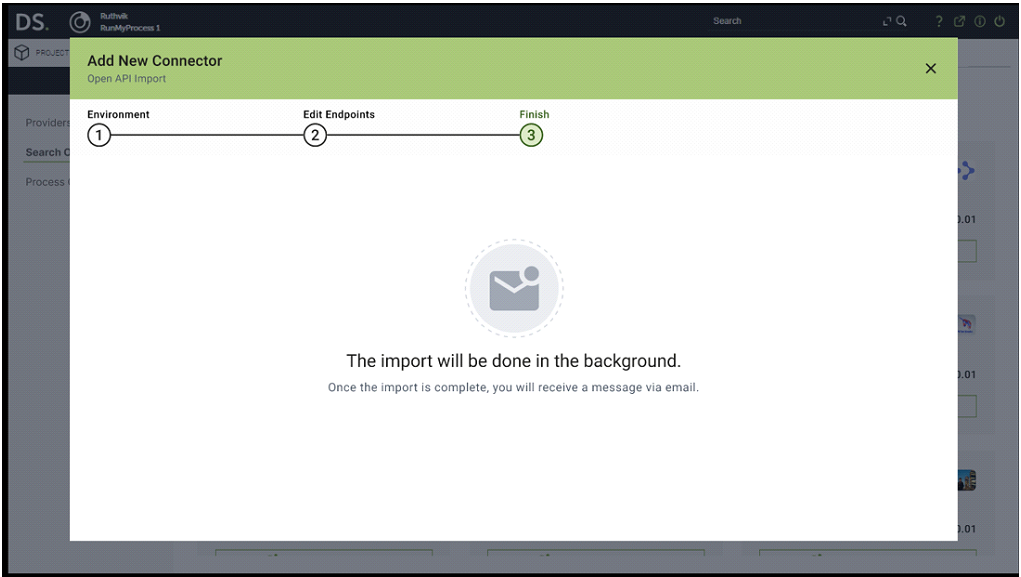
- Importing More Than 25 Connectors: If you select more than 25 connectors, the import process will run asynchronously. You won’t receive an immediate confirmation. Instead, a notification email will be sent to you once the import process is successfully completed. This ensures that even large imports are handled without causing delays in the application.

Disclaimer: Please note that the OPEN API Import feature is provided as a way to facilitate easy access to external connectors from RunMyProcess. If you face any connectivity issues while using the third-party providers, please contact the provider support team.
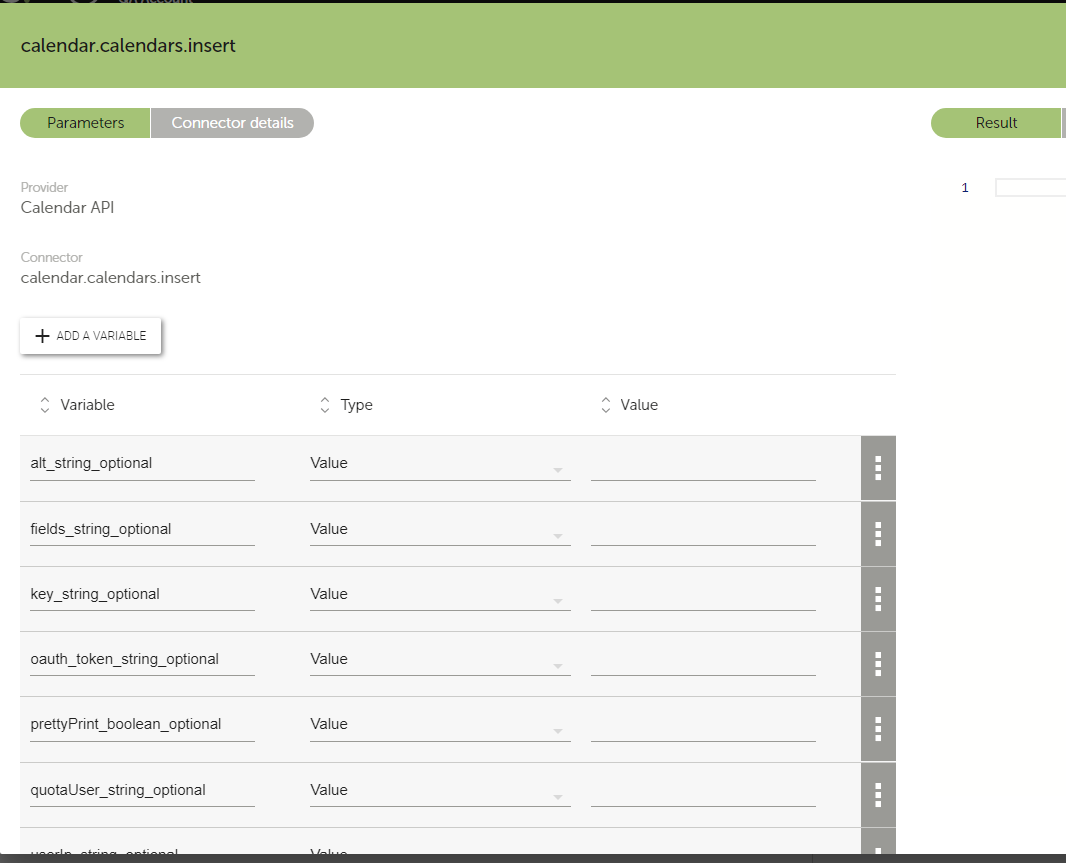
Handling optional parameters
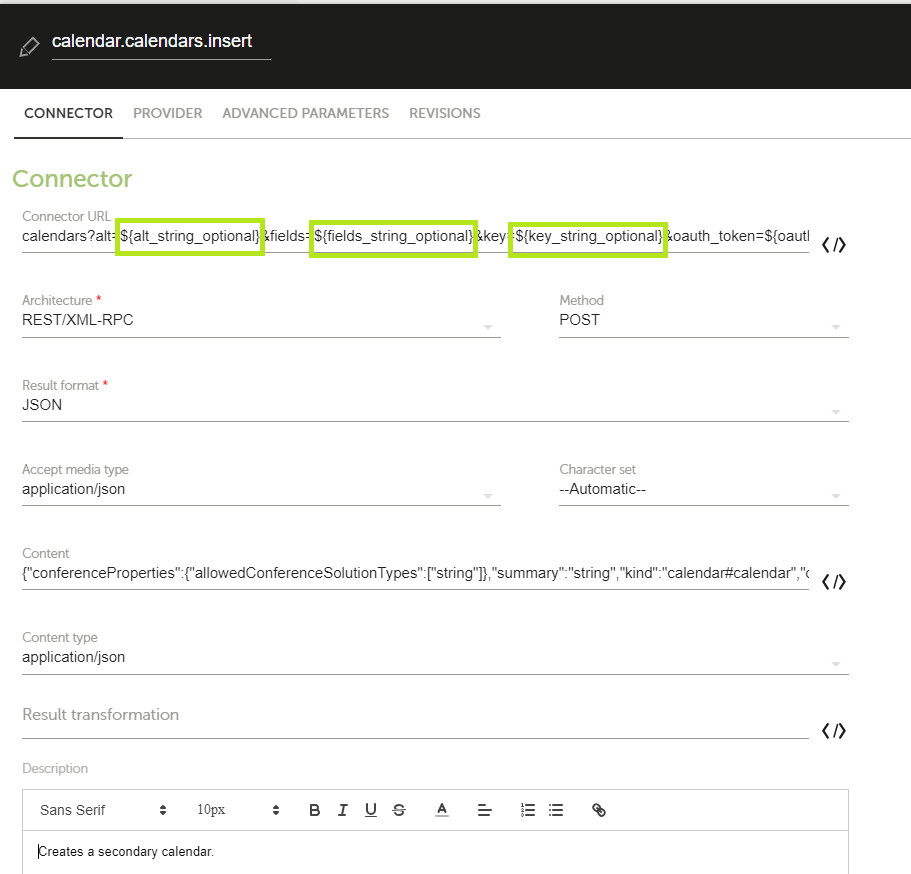
After importing the connectors into the system, the URL generated for each connector will include both optional and required parameters, along with path parameters. If a user chooses not to provide values for the optional parameters, or if they are unsure of what values to input, those optional parameters should be omitted from the URL to prevent connector call failures.
However, it is crucial to note that required parameters, as well as any path parameters and unspecified parameters, must remain in the URL and cannot be removed. These required elements are essential for the proper functioning of the connector, ensuring that the system receives all necessary information for a successful request and thus helping to avoid failure in the connector call.
Handling optional custom headers
Similar to the handling of parameters in the URL, it is essential to manage custom headers appropriately; users should include all required custom headers while omitting any optional ones they do not wish to provide or are unsure about, as this practice helps maintain the integrity of the connector call and prevents potential errors in processing the request.
We can find the required and optional custom headers in the "advanced parameters" section, allowing users to easily identify which headers are necessary for the connector call.

Obtaining Custom OpenAPI Definitions behind a Vendor Paywall
The customer has to download the OpenAPI definition from the vendor's portal (or via the vendor's API), and upload it to the RMP file storage (file visibility PUBLIC). Once uploaded, the customer can then reference the file URL in the RunMyProcess OpenAPI import dialog. Examples for Vendors with customer-specific OpenAPI definitions:
-
SalesForce: https://developer.salesforce.com/docs/atlas.en-us.api_rest.meta/api_rest/openapi_beta.html
-
NetSuite: https://docs.oracle.com/en/cloud/saas/netsuite/ns-online-help/section_1545126526.html
-
SAP S/4HANA: https://api.sap.com/products/SAPS4HANACloud/apis/packages
Transforming a Postman Collection to OpenAPI format
Postman is a popular API tool provider that is hosting "Connector Collections" at https://www.postman.com/explore These API collections are provided by vendors or their community. Postman has its own proprietary format but it's possible to transform the collections to OpenAPI format. There are multiple ways to do this:
-
If you are a Postman customer, you can follow this procedure: https://blog.postman.com/creating-an-openapi-definition-from-a-collection-with-the-postman-api/
-
Via a tool: https://www.npmjs.com/package/postman-to-openapi