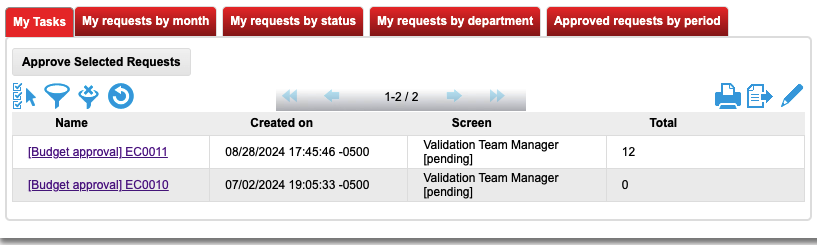
Validation of Set of Manual Tasks
Goal: Create a 'my tasks' report and a button to automatically validate the selected tasks.
Technically, when you validate a RMP manual task, this performs a PUT on the manual task url to change its status and inject the new parameters. After the task is approved the associated process is awaken.
To make this multi-approval feature, we have to inject in the report the manual task urls (different from the name column), and when we'll click on the 'Approve Selected Requests' button, this will trigger a javascript code that:
- gets the selected rows of the report (including manual tasks links)
- updates each manual task (passing a parameter choice="approved' in our example) via ajax calls
- reloads the report when this is done
1. Build the manual task link
Go into your process, click on the manual task activity and open functional tab.
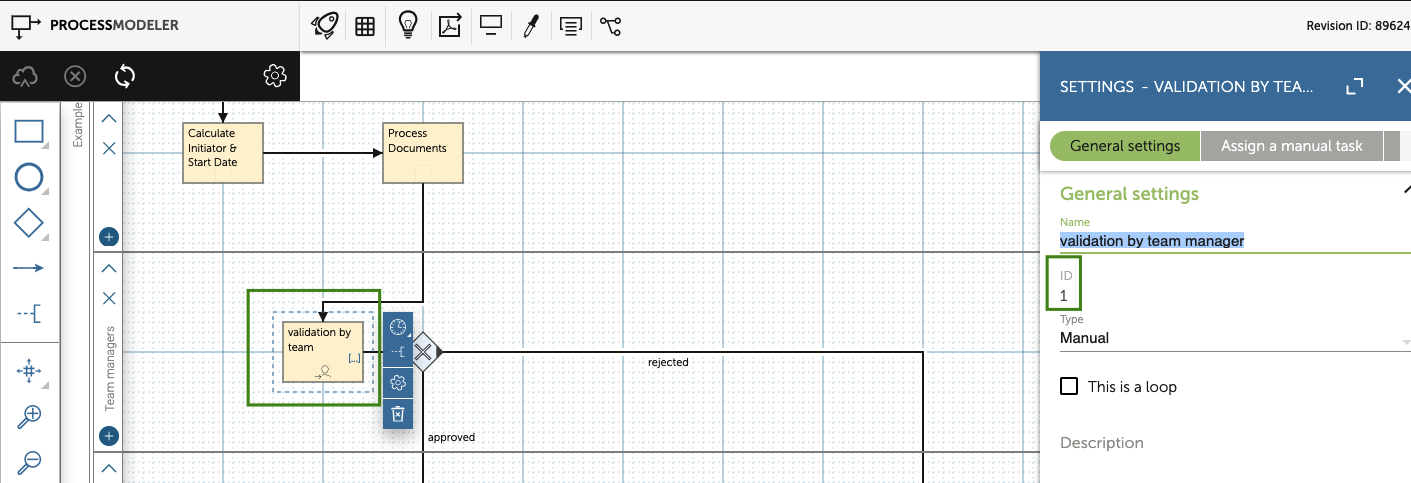
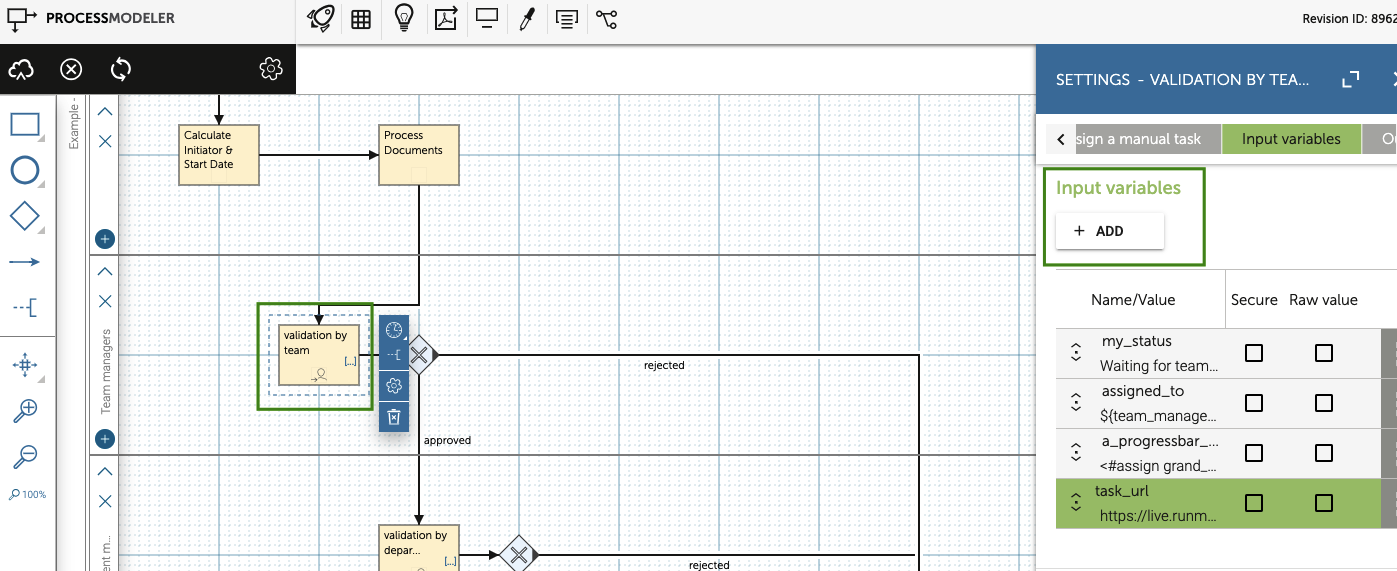
You get the id of the activity: "1". Now click on Input Variables.
Create a variable name = task_url (4) and value = https://live.runmyprocess.com/live/${P_customer}/request/${P_request}/task/ACTIVITY_ID/0 (5)
Where ACTIVITY_ID is the id of the activity = 1 in our example.
So the url becomes:
https://live.runmyprocess.com/live/${P_customer}/request/${P_request}/task/1/0
This variable will be automatically computed when the process reaches this step. To make this variable appear in reports, click on Measures:
Add a new measure and create a new measure task_url = ${task_url}
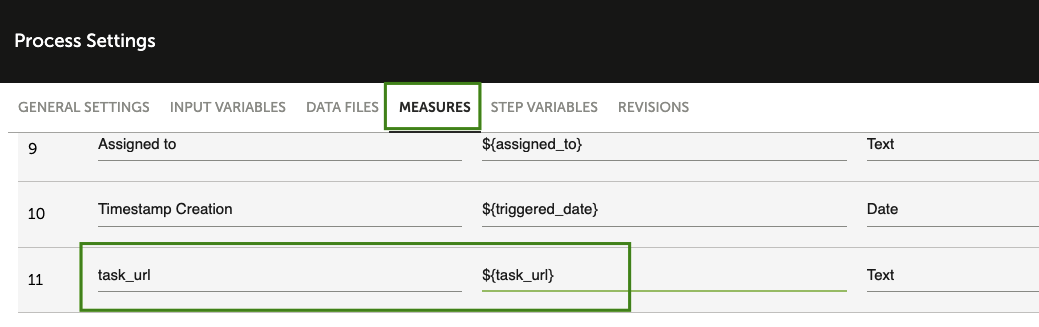
Click on OK and save your process.
2. Configure the report
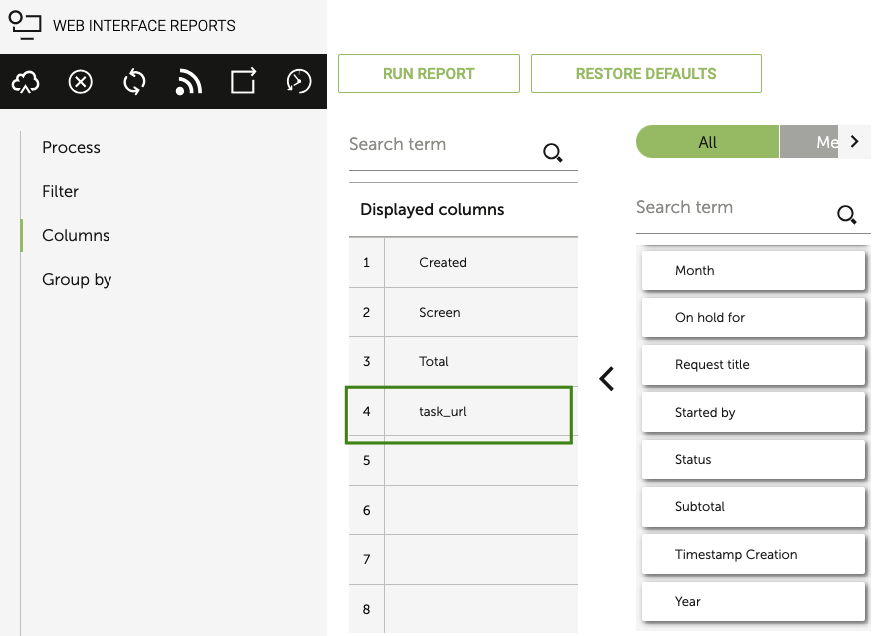
As the measure has been created, you can add a new column task_url in your tasks report:
Note: do check your report displays only manual tasks that are PENDING (="start') in the right approval screen ('Validation' in this example)
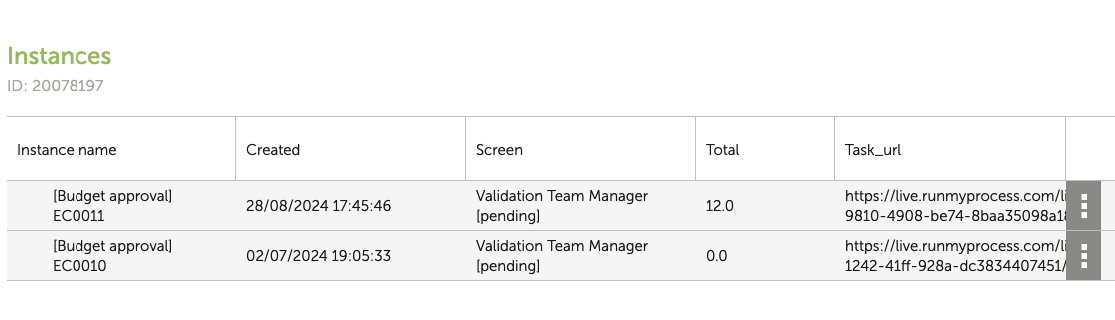
If you click on 'Search results', you should see:
Save your report as 'My Tasks - TEST'.
3. Configure the webinterface containing the report
3.1 Configure the report widget
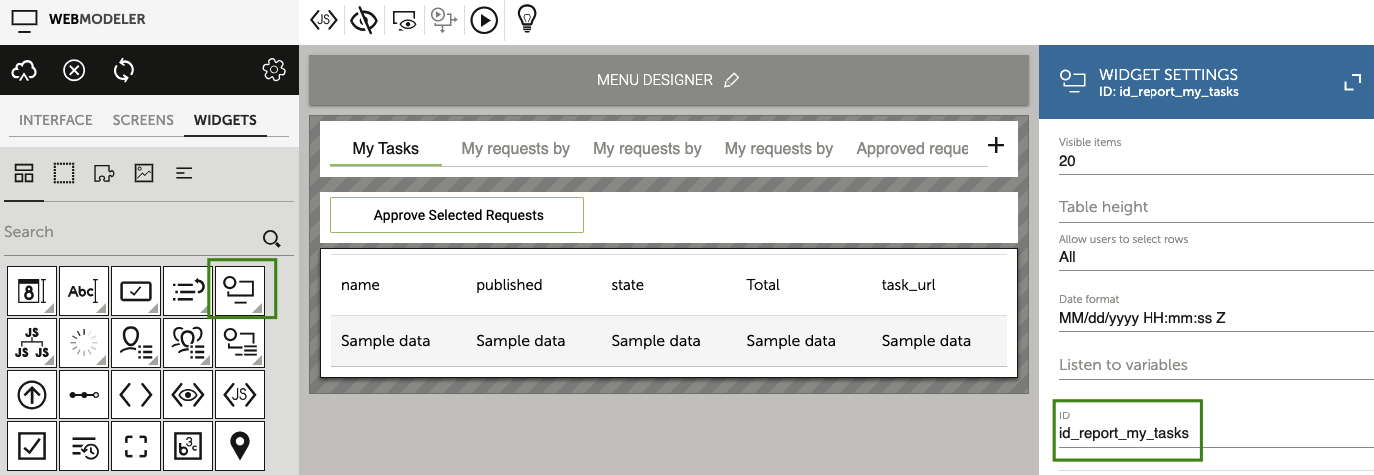
Now your report is well configured, add it to the 'Report' web interface. Put the identifier 'id_report_my_tasks' to the widget.
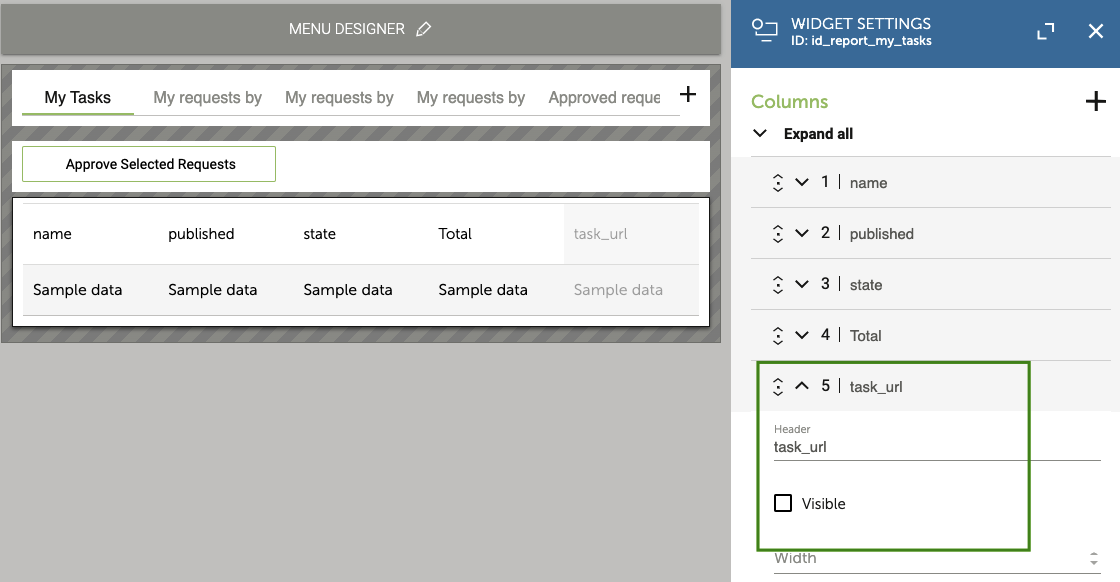
Then go to the columns configuration and untick the task_url column to make it unvisible (4):
3.2 Configure the javascript
We'll perform ajax calls to update the manual tasks.
Note: Please be aware that the JavaScript customizations described here apply only to reports displayed in a web browser. Reports generated by our backend systems do not use, nor execute, browser-level JavaScript.
Include jQuery library as a resource in your Web Interface.
Now add a custom JS file with the following code:
function approve_request( my_task_url ) {

    string_feed = '<feed xmlns="http://www.w3.org/2005/Atom" xmlns:p="http://www.runmyprocess.com/live/" xml:base="https://live.runmyprocess.com/"><title>Process update request</title><link rel="self" href="' + my_task_url + '"/><rights>(c) AK Digital, LLC</rights><category term="event" label="COMPLETE"/><entry> <title>New parameters</title><id>0</id><category term="computed"/><content type="text/base64">eyJjaG9pY2UiOiJhcHByb3ZlZCJ9</content></entry> </feed>';

    $.ajax({
        type:"PUT",
        url: my_task_url,
        data: string_feed,
        cache: true,
        async: false,
        headers: { "RMPData-Version": "v1_0" },
        contentType: "application/xml",
        error: function() {
            alert( 'Error while approving request: ' + my_task_url );
        }
    });

}
Note: This function will perform a PUT call on the manual task url, passing a xml as content (string_feed). You can pass any variable as BASE64 encoded in the content tag. Here the BASE64 content is eyJjaG9pY2UiOiJhcHByb3ZlZCJ9. Decoded value is {"choice":"approved"}
To encode/decode strings, you can use http://www.motobit.com/util/base64-decoder-encoder.asp
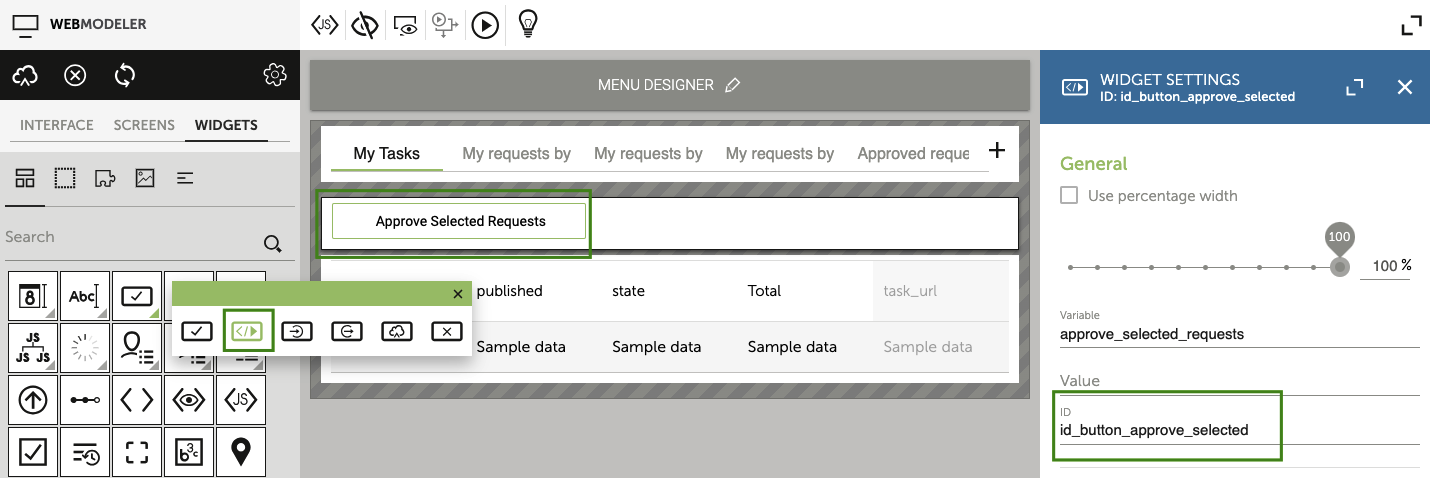
3.3 Configure the button 'Approve selected requests'
Add a button type 'Execute script' and set the id to "id_button_approve_selected":
Update your custom JS file with the code below:
const button = document.getElementById("id_button_approve_selected");
button.addEventListener("click", () => {
    const a_selected_tasks = id_report_my_tasks.getSelectedLinesValues();
    for( i = 0; i < a_selected_tasks.length; i++ ) {
        approve_request(a_selected_tasks[i].measure_9);
    }

    setTimeout( id_report_my_tasks.refresh(), 2000 );
});
Note: This code will get the selected rows of the id_report_my_tasks widget, then will make a loop and call the approve_request function previously defined.
You're done, give it a try!